Monday, 23 January 2012

Collision Detection - Hit Test in Flash

1) Make 2 layers. One named AS and one called circles. On the layer named circles draw 2 circles of different colours. Convert both to symbols --> movie clips.

2)Name one circle circle1 and the other circle2.

3)On the AS layer, hit F9 to do some coding.

This means you can drag Circle1 around. To be able to drag circle2 copy and paste the coding, changing 1 to 2. To check these work hit Ctrl + Enter to preview it.

4) After the above coding. Write this. This is for the Hit Test.

5) Add a new layer called page 2. Add a keyframe into the 2nd frame and write a 2 on it. Make sure the other layers are only 1 frame long. Now to make the jump to the 2nd page when you drag one of the circles over the other circle you need to add some more coding.

Now you should go from a page with 2 circles to a page with a number 2 when you drag and drop one of the 2 circles over the other one.

Variables on Flash

1) Open Flash in Actionscript2.

2) Name your first layer AS (for action script). Then make a new layer and name it button.

3) In the layer named button, make a circle. Right click on the circle --> convert symbol --> movie clip. Also rename it button.

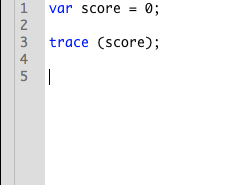
4) Make sure you have the AS layer selected on the Timetable. Then click F9 to get up the Actions option. Here you can do all your coding. The first piece of coding will be...
var stands for variable and creates a new variable.
If you see a //at the beginning of a line in the coding it is commenting it out. Meaning it will ignore that line of the coding.

5) Click on the button and name it in the top right hand corner under Properties where it says Instance name. Click back on the Timeline on the AS layer to carry on coding.
6) This piece of coding means that everytime the button is clicked it will move 5 pixels to the right. I will comment this out but it is just a good example of what ou can do. The coding also means that everytime the button is clicked the output number will go up by 1.
7) Now after the button is clicked 9 times the output goes from saying numbers to saying 'true'.

8) Now when the button is un-clicked or clicked less then 9 times the Output reads 'false'.


9) You next enter a text box onto the AS layer. In the Properties section make sure the text box is a Dynamic Text. You then go into the Options and in the Variable section write score.
Now when you you Ctrl Enter to preview the button working the text box shows the score number.

Making a 3D moving image in After Effects

You need to open Photoshop in these settings and give the image a name. The only setting you will need to change is the preset to 'Film & Video' and size to 'DVCPRO HD 1080p/29.97'. Then click OK.


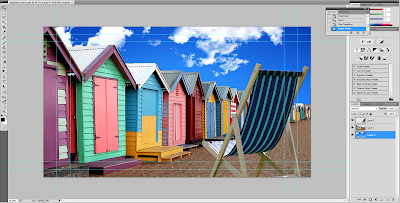
Making an image in Photoshop with layers to convert it in After Effects into a 3D moving image.


You can also make the image go in and out of focus and move by adding keyframes on certain options on the timeline. I played with the aperture, depth of field and the focus distance.

Thursday, 12 January 2012

Tracking on After Effects


1) Film a short piece of film with a tracking point. For mine the tracking points were the corner of the buses sign, the number of the bus and the two headlights.

2) Import -> File -> And choose the video clip.

3) Choose what you want to be tracked. In my case the Thomas the tank engine face. I saved one off Google and on Photoshop took away the background. I then imported the file in After Effects with the video.

4) Next you need to check that the track points stay on track when the bus moves. You can either do this frame by frame or play the video and back track the frames. As the bus got bigger I had to change the scale of the tracking points.

5) Once all the points stay on track you can put your image on. Double clicking on the bus video on your timeline and go to the Edit Target in the tracking panel to the right of the screen. This should open a window which automatically chooses your image layer to be the target. It then opens a window with the axis. Make sure it is on the X and Y axis in the drop down panel. Ok this.

6. The Thomas Face is now on the bus. You should play through video to check the face sticks to the tracking and is in scale throughout.

7) Once it's all ok you can render your video and export it as a video. That video is above.

Monday, 9 January 2012

Using Photoshop to create Encore Buttons/Menu


These screenshots show how to make buttons in Photoshop for an Encore DVD menu.
Instead of making a new layer write each piece of text in a new folder labelled (+) and whatever the button is, e.g. (+)Play.
(+) - makes the folder into a button
(=1) - is the highlight for the button
The highlight looks like a empty layer in the folder but once in Encore it highlights the button when it's clicked.
You must save this menu as a psd file to be able to work with it in Encore.