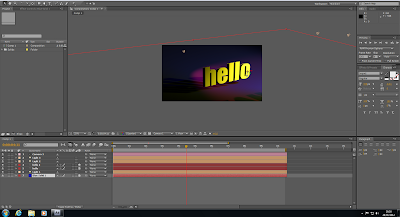
1) After creating a new composition you firstly create a blue solid. You can either have this behind the text or underneath like I have made it. You can make it underneath by simply rotating it on the x axis. You also need to make this a 3D layer. This option is in the timeline next to where it says Solid layer.
2) You next make the text layer. After writing in your text you need to also make it a 3D layer. For my composition I made two text layers and placed one slightly behind the other on the Z axis. This is just to give the text more of a 3D look. It doesn't look that great at the moment, to really achieve the 3D look I would need to duplicate the text layer more times.
3) You can next add your light layers. With these you can choose the colour and type of light you want on the text. The different types of light are spot, parallel, ambient and point. I chose to use spot for mine. You can also play with the intensity of the light, the cone angle and the cone feather.
4) Using the orbit camera you can move around the text and place the light where you want it, either behind or infront of the text. If you want the text to have a shadow when the light shines behind or infront you need to go into the timeline on the light and text layers and check that 'casts shadows' is set to 'on'.
5) You can now add more lights if you wish. I have three on my example which gives my text a real 80s look.
6) I added a camera layer to my composition and made so if you played it the camera moves across the text and then zooms in at the end. For this I had to add keyframes on the timeline in the camera layer.


